Brush, Cloth or Sponge for Applying Paste?
Choose a brush, cloth or sponge for applying paste to paper, with clear guidance on matching control, coverage and cleanup to your project.
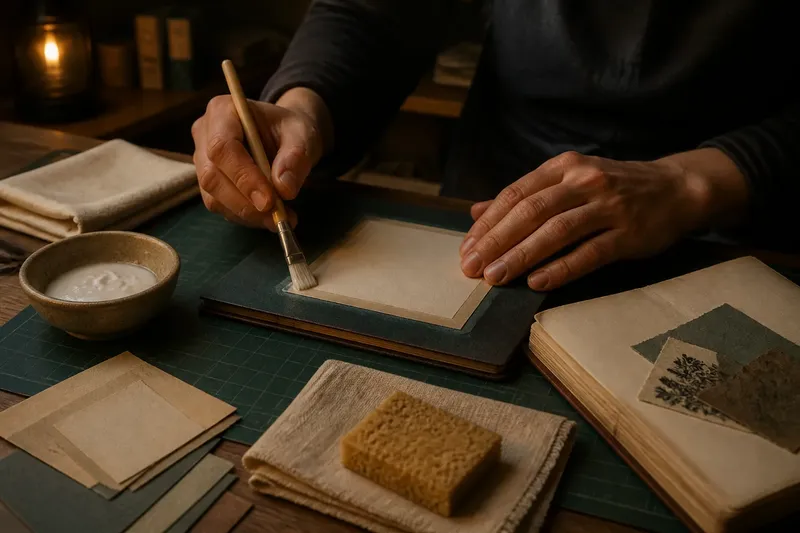
Brush, cloth or sponge for applying paste? For a paper hinge, a clean craft brush can keep adhesive close to the fold; for a broad collage shape, a flat sponge may cover the open centre with fewer passes. Choose by the shape of the pasted area, the paper’s sensitivity and how easily you can control the tool.
Set out a washable mat, scrap paper and a clean cloth before you begin. Check the paste label, especially if the adhesive is unfamiliar, and try it on a scrap of the same paper. That small check can reveal whether the paste spreads smoothly or leaves marks.
How do you choose an applicator for paste?
Start with the boundary. A narrow strip, small tab or irregular edge needs precision; an open panel calls for steady coverage. Then consider the paper: thin or absorbent sheets are easily disturbed by excess moisture or repeated strokes, while sturdier paper can tolerate a broader, firmer pass.
Paste consistency matters too. Thick paste may drag or clump beneath a light tool, while thin paste can spread beyond an edge. The practical aim is a continuous, thin film that reaches the intended area without pooling. If the applicator makes that difficult on a scrap, change the tool or use less paste.
Check whether the area has a narrow edge or corner; if it does, use a small brush, and if it is open, choose cloth or a flat sponge.
Check whether the paper is delicate or absorbent; if it is, use a lightly loaded brush and gentle strokes, and if it is sturdy, consider a broader applicator.
Check whether paste beads or clumps on the scrap; if it does, load less or change tools, and if it forms a smooth film, proceed with that applicator.
Check whether the surface is textured; if it is, use short, gentle strokes and inspect the hollows, and if it is smooth, use an even continuous pass.
Check whether the tool sheds fibres or leaves marks; if it does, set it aside for a clean alternative, and if it stays clean, continue while keeping it within the paper’s boundary.
Check whether prompt washing is practical; if it is not, choose a washable cloth you can set aside for adhesive, and if it is, rinse a reusable brush or sponge as soon as the work is done.
When is a brush the better choice?
A small, soft craft brush is usually the most precise option for a fold, narrow border or paper tab. Keep it separate from paintbrushes that might carry colour or dried residue. Dip only the bristle tips, then draw light strokes along the paper. If paste gathers at the ferrule or forms a bead at the end of a stroke, remove some on scrap before continuing.
The trade-off is speed. A small brush needs repeated passes across a broad panel, and those strokes can disturb thin paper or leave ridges in thick paste. Use a wider brush for a larger area rather than pressing harder with a narrow one.
When does cloth make sense?
A clean, lint-free cotton cloth folded into a flat pad can glide paste across a modest, open area. Touch one face lightly to the paste, then spread it with an even movement. Its softness can suit a paper surface that feels vulnerable to bristles.
Cloth is less exact at edges and can absorb adhesive unevenly. A saturated fold may leave a heavy patch; a dry one may drag. Turn to a clean part of the cloth as needed, and avoid fabric that sheds fibres. Keep any cloth used with adhesive apart from household cleaning cloths.
When should you use a sponge?
A small, fine-textured sponge works well on a broad, uncomplicated shape. Its flat face can cover an open area in a steady pass, but a coarse household sponge may leave dots or pools. Use a lightly loaded sponge and move continuously rather than dabbing: repeated dabs can build up paste in one spot.
A sponge is blunt at corners and can push paste past a narrow outline. Use a brush to finish an edge that needs more control. Rinse a reusable sponge promptly, since dried paste can stiffen its surface.
Which tool should you use for each paper-pasting question?
Which tool gives the most control on a narrow edge?
A small brush can follow a boundary without covering much neighbouring paper. Keep its load light and turn the work to reach awkward angles.
What works best on a broad panel?
A flat sponge or folded cloth covers an open panel with fewer passes than a small brush. Choose a sponge for a simple, sturdy surface; choose cloth if a softer glide suits the paper.
Can one applicator handle both the edge and the centre?
It can, but switching tools often makes the work tidier. Spread paste across the open centre with cloth or sponge, then use a brush near corners and edges.
What if cleanup is the main concern?
A brush or sponge can be rinsed and reused if you can clean it promptly. A washable cloth is another option, but dedicate it to adhesive because paste can remain in its weave.
How should you apply the paste?
Protect the work surface with a washable mat. Arrange the paper pieces in their intended order, then place a scrap of matching paper within reach.
Choose the tool according to the boundary: brush for a narrow or irregular area, cloth for gentle spreading, or sponge for a broad, simple shape.
Touch the applicator to the paste, then test it on the scrap. If it leaves a puddle, clump or dry streak, adjust the load or change tools; begin on the project only when it spreads as a thin film.
Coat one manageable area at a time, keeping the applicator inside the paper’s edge. Stop once the surface looks even rather than making repeated passes.
Align the pieces before pressing. Smooth from the centre towards the edges with clean fingers or dry scrap paper, moving trapped air out without smearing paste.
Rinse a brush or sponge, or set the cloth aside for washing. Inspect the paper for exposed paste, dry gaps, ridges or ripples, then leave it supported on a flat surface in line with the adhesive’s directions.
What does the choice look like on a real project?
Imagine you are attaching a small label to a sturdy notebook cover; the label has a narrow border and a broad centre. Start with a scrap of the same cover paper and a small craft brush. Put a little paste on the scrap: if it beads, wipe some from the brush; if it forms a thin film, use that light load on the label’s border. Then spread paste over the centre with a flat sponge, stopping at the brush line. The expected result is a continuous coating that stays within the label’s outline. If the sponge pushes paste over an edge, switch back to the brush for the remaining centre instead; the trade-off is slower coverage in exchange for closer control.
For thin paper, use less paste and avoid scrubbing. On textured paper, short, gentle strokes help reach the raised areas without filling every hollow with adhesive. Follow the product label and any maker’s instructions; if the paste is unfamiliar, the scrap lets you check how it behaves before it reaches the project.
What should you inspect before setting the work aside?
Look along the edges for a glossy line of excess paste. If the paper and adhesive allow, lift it with a clean, damp cloth; do not rub a delicate surface, since friction can roughen it or shift the paper.
Scan the pasted area for dry gaps, ridges or ripples. Pressing repeatedly may push paste out at the sides, so correct only what is needed and leave the piece supported on a flat surface to dry according to the adhesive’s directions.
For brush, cloth or sponge for applying paste, choose the tool that handles the hardest part of the job: edge control, broad coverage or gentle spreading. A quick scrap-paper check can help you settle that choice before the project itself is at risk.